Now that we have a better understanding of card types we can start to explore how to mix and match them throughout different stages of the game to create different deck archetypes. Archetypes are powerful themes that create synergies between the cards in your deck. They each have their own function and feel to play. Playing in an archetype is more effective than not playing in one, and some archetypes can be used to counter the one that your opponent is using. I touched on this idea and how it interacts with what the factions generally do in the second part of my Fighter series (Strategic Dominance). This time we will look at how this happens based on primary effects of cards rather than faction.
By changing the ways you combine the four different card types you can create different deck archetypes that work as a cohesive whole. If you only buy cards of a single faction they will all work well together since most of them work towards the same goal (and provide faction bonuses), but that doesn’t mean you need to stick with just that color, or just a second, or even third color. Cantrips (cards which draw and don’t take up room in your deck) don’t necessarily need to fit with your archetype. There are some cards that are so good that you can buy them even when they don’t fit your archetype or even change archetypes because of them. Otherwise you want to make purchases with the goal of putting one of these archetypes together. The four simplest archetypes stick to just one of the four card types but others combine the elements of two or more card types to form a cohesive strategy. Some classes are better suited for some archetypes than others, but all classes can make use of any of them.
Defensive Build
Load up on Imperial cards that give you life gain and a lot of champions that your opponent will have to spend damage on. Your damage output will be low at first but you will be able to take a lot of punishment and eventually your damage will wear them down. The key word there is “eventually.” You are playing for the long game here, not trying to win in just a few turns. Sacrifice is key to this strategy, since the game will go long enough for you to sacrifice all the way down. Buy life gain, sacrifice, and champions. You may prioritize good champions over great actions in some cases (but not always). Don’t feel the need to buy a lot of damage even if they have it, since they will be spending their damage on your champions. Whatever damage gets through them can be healed while you continue plinking away at their health. A couple of big damage bombs will go a long way here since you’re likely to play them more over a long game, and since your opponent will be busy getting enough damage to take out your champions they may leave themselves defenseless. A good counter against a defensive opponent is buying sacrifice since you will have time to thin your deck down with it, and buying a little defense yourself since their offensive output will be low. Just make sure to buy enough damage to take out their champions too.
Economy Build

This is perhaps the trickiest build and one that I see newer players overcommit to most. You want to build up a massive economy lead early and just keep buying more and more cards until you simply get enough good cards to win. Most of your starting cards are weak but if you buy enough good cards they will be a small percentage of your deck. It’s not very efficient but it has the ability to be really effective. Remember, economy needs time to be effective, so be careful of your opponent loading up on damage while you’re still getting into gear. The Imperial faction is naturally good at this because they provide both economy and defense, but so are any champions that provide economy. With this build you need to pay attention to what your opponent is doing so you can respond in time (it may take a while to shift the focus of your deck with that many cards). Don’t feel like you need to buy all the cards you can just because you have a massive amount of gold. You need to make sure the cards you add will actually improve your deck, so don’t be afraid to waste gold if the market row is full of things you don’t need.
A lot of economy also leaves you a lot of flexibility to go into offense or defense so keep an eye on your opponent and work to counter them, since you will need to go for more offense and/or defense because economy alone can’t win games. As always, economy which sacrifices itself (or other cards) or draws cards is preferable since economy is only useful in the early to mid-game. The longer a game goes the more your early investment in economy will pay off, but this is a temporary archetype and you don’t want to keep buying economy in the end-game. The economy player’s main synergy is with the market row itself, and failing to transition out of economy into combat or defense will keep this archetype from being effective.
Damage/Aggro Build
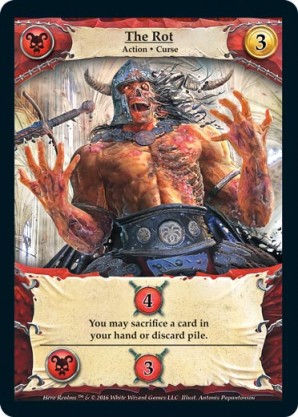
If you see a lot of cheap damage on the row, start buying it all up as soon as possible. This can be an option even if there’s a big bomb on the row if you believe your opponent is overextending themselves buying nothing but economy and you think you can undercut them before they get the bomb they’re chasing after, or at least play it enough times to kill you. Cheap, efficient damage is the key since you will have limited economy. Sacrifice cards are good to get your damage to come together, especially damage cards that sacrifice like The Rot which will further your primary goal. This build is gambling on you being able to force a shorter game. An opponent with a lot of economy will ramp up their deck exponentially since they will be able to buy a ton of great cards, whereas if you are focusing on cheap combat you are only adding a few cards at a time and improving your deck linearly. Your cheap damage will be overtaken given enough time. The key is to not allow your opponent the time for this to happen or to recognize if it’s starting to happen and switch strategies. As long as your combat is greater than your opponent’s defense, keep it up, otherwise you’ll have to quickly switch strategies or fall behind in a longer match. You must work quickly to counter this archetype with defense or whatever archetype you’re building won’t have time to come together.
Speed Build
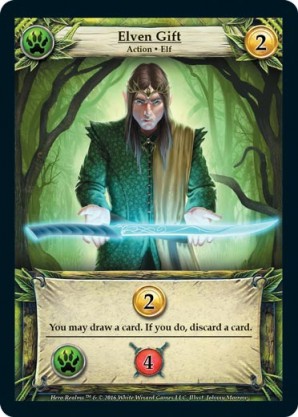
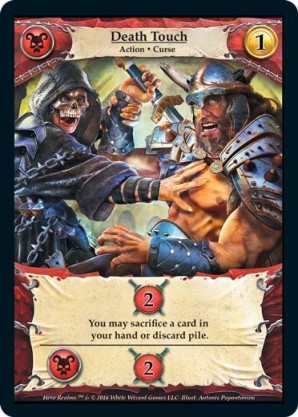
Sacrifice, draw, and cycling cards are very useful for any of the other archetypes but they can be their own archetype too. The goal is to build up a massive card advantage over your opponent that creates a deck too fast for almost any other deck to counter – if you have time to sacrifice down. This is best done when you’re able to buy a couple of sacrifice cards early and commit to it by not buying cards that do not grant card advantage. A single Death Touch and an Elven Gift can thin a deck dramatically if you don’t buy any cards you don’t need and you can only increase this effect by buying more card advantage cards and staying disciplined in your purchases. Prioritize economy cards that sacrifice themselves such as Fire Gems or Nature’s Bounty because this build is especially sensitive to getting clogged with unnecessary cards.
You’ll probably want to pick up at least some champions or healing to stay in the game long enough to sacrifice down, especially if your opponent has a damage build. There’s nothing like making your opponent spend all their damage to tear down your champion wall just to cycle your entire deck and put them right back into play so they have to do it every turn. Damage cards are a great alternative here too, especially ones that draw, since you’ll be cycling them often. This is probably the best archetype in the game to start with because it’s great on its own or it can quickly branch into damage/sacrifice or defense/sacrifice and serve to maximize the other archetype you shift towards – don’t feel like you have to stay locked into a speed deck but if you do shift, do it deliberately and quickly into damage or defense. If your opponent is building to this you need to counter it immediately by getting your own card advantage and/or loading up on damage to kill them before their deck comes together because once it does it will move too quickly to counter.
There are also other archetypes which are made possible by combining the different card types.
Champion Build
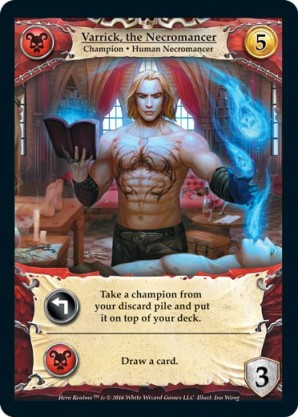
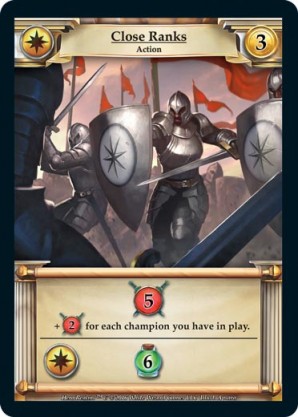
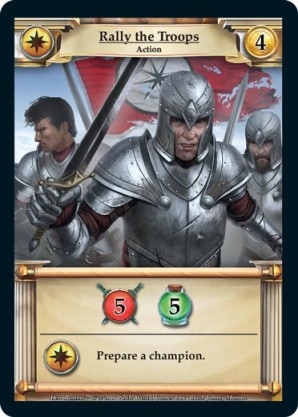
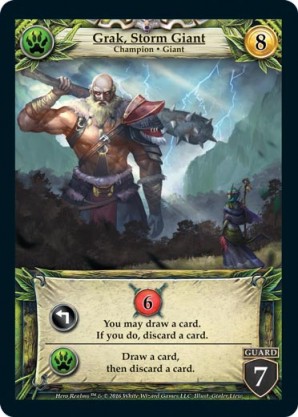
This is similar to the defensive build but with a few key differences. First, your main goal is to purchase every champion you can, especially champions that benefit from having other champions (Kraka, Varrick, Tithe Priest). Your secondary goal is purchasing actions that improve when you have champions in play (Close Ranks, Recruit, Rally the Troops). You don’t necessarily need life gain cards or even sacrifice as much as the defensive build (although it’s always very useful in this build) since you can be pursuing an offensive champion build that might force a shorter game, but sacrifice does synergize nicely since you’re likely to go long. Champions are like a shadow fifth faction in the game. Your opponent is less likely to be able to take them out the more you have in play and so they start to build up and provide synergy just by having so many cards in play. They can also speed up your deck by staying out in play rather than clogging up your discard. This synergy between all champions which builds up over time, and actions that work with them can form the basis of their own archetype. A nice mix of guards and non-guards goes a long way here, and even weaker champions are stronger in this build in the end-game. Watch out for opponents making a damage rush build before your champions have time to pile up and for automatic stuns. To counter this archetype, buy your own champions and load up on damage to take out your opponent’s. Free stun effects are great to counter champions.
Balanced (Offense/Defense)
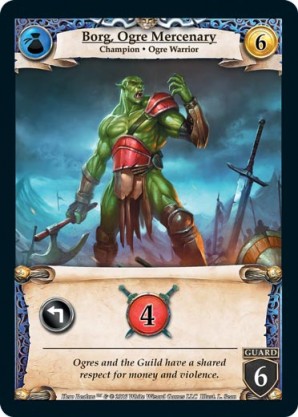
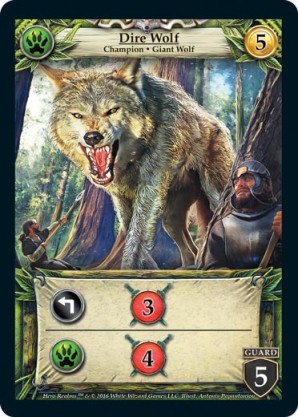
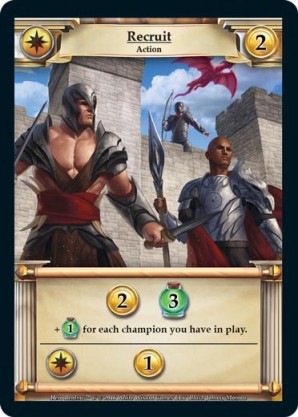
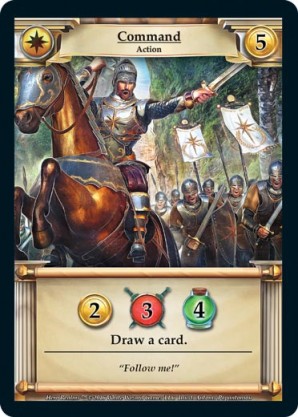
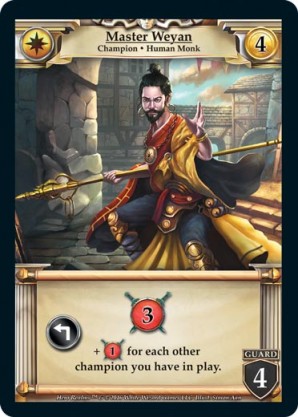
This is a balanced blend of damage and defense. You are making an effort to hammer away at your opponent but you’re not leaving yourself completely open for their attack. In this build champions which give damage (Borg, Dire Wolf, Master Weyan) shine, since they’ll help you on your path to reducing your opponent’s health to zero while forcing them to spend damage on your champions. A few strong guards in what is mainly a damage deck is perfectly fine for this build too. Imperial cards like Rally the troops and Domination that give offense and defense at the same time are also good, though you can take pure damage and pure defense cards as well. While this build is focused on its relatively equal damage and defense it can have economy and card advantage elements as well, although you want to avoid being a real jack of all trades and overloading too much on economy. The best economy cards to purchase in this deck are ones that also provide offense (Command) or defense (Recruit).
As with all strategies sacrifice is good, but in this build I would favor sacrifice that does damage like a Death Touch or The Rot instead of economy sacrifice (like Dark Reward) since that plays into the damage half of your deck. The defensive half of your deck will make sure it will be able to pay off by getting extra turns to sacrifice. Watch your opponent carefully to see if you need to buy more damage if they go champions or more defense if they go damage. Avoid the trap of thinking your deck is unfocused or doesn’t have an archetype – your main goal for any purchase is maximizing the total “swing” of your combined offense and defense each turn over the course of the game. This build is great for surviving a damage rush and getting enough damage in before they realize they need to shift out of it, or of doing enough damage to take out the champions in a defensive build but being able to play the long game with them as well. It can have some trouble against a really fast deck though since ultimately an authority “swing” doesn’t win you the game but damage does, so try to counter this archetype with a speed build.
Control Build

This is similar to the damage build since the best damage cards, Wild, are the best control cards too. This is why they are often regarded as the strongest faction in the game. The Wild faction provides important control by forcing discards, which often makes your opponent unable to buy good cards or perhaps fall short on damage to take out your champions. Remember, the more discards you can group together in one turn the more devastating it will be since they’ll often have one or two cards they don’t mind letting go of but a third or fourth can be crucial – so here sacrifice and draw is key to get your discards to group together.
Discards also become more powerful the later the game goes since your opponent is likely to sacrifice down and is discarding much better cards, therefore control builds are better than damage build for longer games, and discard cards are a great investment in any game you foresee going long (either with or against a champion or defensive build). A late game discard combo can disrupt your opponent’s entire strategy – causing them to have less damage or life gain than they’d thought, disrupting draw cantrips, or discarding champions before they enter play and opening a hole in the champion wall for you. With these cards, you will be doing damage but unlike damage you are prioritizing discards over pure damage, and perhaps even over card draw. Do not play for economy against this build, but do prioritize damage and/or defense. Card draw is very good for countering discards, so favor cards that cycle or draw.
Mixed/Reactive Build
This is a deck that may look unfocused but has hidden levels of synergy your opponent might miss if they are analyzing it by its factions and not its card types. It’s basically an anti-archetype that just mirrors your opponent and the market row, and is probably the closest you can come to playing without a true archetype and winning. The key to this deck is prioritizing certain card types based on the stage of the game, the market row, and your relative strengths and weaknesses to your opponent. First, in the opening row determine what type of game this might be. If it’s cheap combat play a damage deck, otherwise this deck starts out by prioritizing buying sacrifice first and economy second. If there are one or more big bombs on the row you can prioritize economy first though. Then see what your opponent does to see what direction you should shift to in the second deck if possible. If they have a sacrifice lead go damage, if they have a damage lead go defense, and if they have champions buy damage. Sacrifice is always prioritized in the first and second decks unless they have a massive damage lead and you need defense or if you are both racing for an obvious bomb. In the third deck, you will prioritize cards which draw but you are mostly looking for more damage and defense, prioritizing damage if they have champions and/or life gain, and defense if they are damage.
Throughout this process you want to not overinvest in economy (economy that scraps itself is best) and just maintain slightly more economy than your opponent if possible or play control with discards. Keep an eye on the row since your economy value is also based on the relative costs of the cards in the row. By the mid-late game you’ve sacrificed any of your economy cards you can unless they also provide an additional benefit. In the late-game if you do make any purchases they are to pick up cards that will finish your opponent or provide you enough defense to survive another turn or two. During all of your purchases you will buy cards of similar factions when possible but you will not take them if they don’t conform to this basic strategy.
More important than buying the right factions are buying the right card types for when they will be played (usually a deck later) and buying cards to deny your opponent from getting ones that benefit them. This deck archetype represents a better understanding of card types and their relation to the game state and the pace of the game. The strength of this build is being flexible and adaptive to what your opponent is buying, the changing market row, and adjusting your tactics relative to the amount of turns left. All of the above archetypes benefit from this type of game play but this one is the most adaptable. We all know that no game is ever typical, but the key to this archetype is always reacting to your opponent and the market row and knowing when to increase your economy, card advantage, defense, and damage.
Conclusions
As you can see from the above archetypes, just as there is a lot of overlap between factions and even individual cards with the four types of things they do, so too is there a lot of overlap between deck archetypes and the types of cards that are useful to them. While some archetypes may want similar types of cards, each has its own unique feel and functions differently than the others. However you can transition between one archetype and a similar one if you make deliberate purchases to do so. The key to building archetypes is to recognize which ones both you and your opponent can possibly build into as early as you can. Sometimes you can see this from the opening row before you even make your purchases – a bunch of cheap damage lends itself to a damage build whereas expensive cards may lead towards an economy build. Oftentimes you won’t know until you are in your second deck cycle, after making your opening buys. Your opening buys should be strong on their own and potentially give you multiple avenues towards archetypes. Buying them doesn’t commit you to any one archetype but will be useful in whichever one you go into.
By your second deck you may not have cemented an archetype yet but you’ve probably ruled out a few archetypes that don’t fit with the cards you’ve already bought, so you’ll only want to buy cards that can fit with archetypes you can still go into. At every stage, you want to keep an eye on what archetypes your opponent can build to and either try to keep them from buying cards that would fit with their possible archetypes or try to find an archetype to cancel theirs. A defensive build with a lot of sacrifice will usually beat a straight damage deck without sacrifice for example. Hopefully you’ve at least started building a cohesive deck and are heading towards one or two archetypes, because by the time you are in your third deck you need to have an archetype you are already improving on or you will probably lose. These purchases must be able to cement your archetype into place so you can play out a proper deck in your final turns.
When you are looking to counter your opponent’s archetype by building one of the archetypes of your own, the key variable to consider is the length of the game. Will this be a longer or shorter game based on the amounts of damage and defense both players are taking and with what’s available in the row? With that information in mind, would you like to force the game to go longer or shorter than it is currently going? A damage build needs a short game to succeed while an economy build needs a long one. A defensive build will certainly force a long game, and a champion build won’t be defeated quickly although it can certainly win quickly. A speed deck can force a short game but is set up to get better and better as the game goes on, whereas the damage deck which forces a short game can’t survive the long game if your opponent has a defense and/or champion build. Each and every archetype can be countered by responding to an archetype which either matches the requirement for a short or long game or forces the game length to be more compatible with their archetype. If you might win in a short game but will definitely win the long game, force the game to go long by buying champions and defense. If you have no chance of winning the long game load up on combat and card advantage to try to force the short game, otherwise start shifting into defense and continue buying card advantage which will help improve your deck over time in the long game.
In summary, don’t be fooled by a card’s faction into thinking you know exactly what it can do. The four card types of damage, defense, economy, and card advantage are more important than a card’s faction. Each of those four card types has various degrees of usefulness in the opening, mid, and late game. The relative valuations of cards change depending on their usefulness to your deck archetype and to the state of the game, so think carefully before buying and don’t be afraid to make unconventional plays if you believe it meets the criteria. Remember, every game is situational. As a general rule though, the key to success is purchasing cards for their primary effects in order to gain maximum benefit from them. Faction bonuses provides a useful and often powerful upgrade to cards but cannot be relied on as much as a card’s primary effect and is less of a concern. What is of the most concern is getting the four card types to come together into a cohesive deck archetype and building a deck that responds to what your opponent is building towards using the cards available in the row, taking into account the pace of that game. Whoever builds the deck that synergizes best with their existing cards while adapting to the ever-changing game state will be more likely to win.
This was the second part in a series discussing card types, deck archetypes, and game pace. If you haven’t read the others, I recommend you check them out as the reading order isn’t as important as understanding the concepts brought up in each article. The ideas can tie together in a gestalt manner to increase your understanding of Hero Realms better than just focusing on a single part.
Title: From Novice to Expert: Deck Archetypes
Category: Deckbuilding
Tags: #Advanced, #agentc13, #Analysis, #Base Set, #Card Advantage, #Damage, #Economy, #Hero Realms, #HR Digital, #Sacrifice, #Strategy, #Strats, #The Kittyman
Published on: February 17, 2022
Tim "agentc13" McKenzie is a Hero Realms Legend (2021 Origins Game Fair) and an avid player of board/card games. He works in the cable telecommunications industry, has been happily married for over 17 years, has two awesome daughters, and two quirky cats.
He streams Hero Realms weekly at https://www.twitch.tv/agentc13.
He is always welcoming of challenges in game (IGN: agentc13), and frequents the Realms Rising and WWG Discord.